
- Markforged Onyx Filament Review & Alternatives [2024] - December 11, 2024
- 17 Best Professional 3D Printers: Commercial, Desktop, & Industrial [2024] - December 10, 2024
- Best 3D Printers (Industrial, Desktop, & More) [2024 Guide] - July 20, 2024
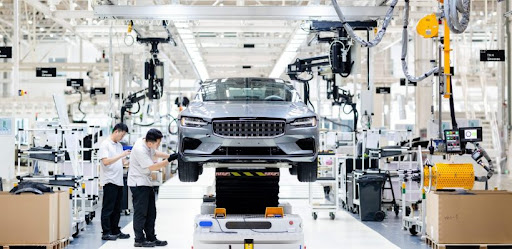
3D-printing technology has become a vital part of the automotive industry thanks to its accuracy, precision, and sustainability–factors that have opened the doors to the production of high-precision and functional 3D-printed car parts. 3D printing makes the production of car parts faster, more efficient, and more affordable.
This guide highlights everything you need to know about 3D printing in the automotive industry and some of the best use cases for this innovative technology.
What Kind of Car Parts Can You Make with 3D Printers?
Although car manufacturers are not making entire cars out of 3D printers, the process has been used to create car parts such as vents, caps, and pistons. Other important car parts made with 3D printers include:
Automotive Prototypes
Automotive prototypes are one of the earliest uses of 3D printing in the automobile industry and offer numerous benefits, ranging from cost reduction to reduced errors due to high precision and less production time.
Prototypes are used to test a car’s design and engineering and gauge how the car will look and feel as a finished product. It’s an integral process in automobile production that allows changes to be made to a car’s design without requiring it to be built repeatedly.
Prototyping used to be a very time-consuming process in the automotive industry. Traditional prototyping methods can take weeks to create a physical model. 3D printing, on the other hand, can create a detailed and accurate prototype within a matter of hours, or even minutes depending on the size and complexity of the part. This allows for much faster iteration and testing of designs, leading to faster innovation and product development.
Using 3D printers for automotive prototypes is also more cost-effective. Traditional machining and molding methods can be very expensive–especially if the prototype requires a custom mold or tool. With 3D printing, there are minimal tooling costs, making it a more affordable option for low-volume production or testing. 3D printers are capable of creating highly detailed and precise models with minimal human error–errors that could have been costly.
With many 3D printers offering same-day automotive prototype manufacturing and shorter turn-around times, automotive companies can shorten the time between the birth of an idea and the creation of the final product.
Jigs and Fixtures
3D-printed jigs and fixtures can be used to hold car parts in position during machining, drilling, assembly, or quality control testing. They can also be used to position the components during a welding process, ensuring precision and efficiency.
One of the main advantages of using 3D printing for jigs and fixtures is that they can be customized to fit specific car components. Traditional manufacturing methods require expensive tooling and can take several weeks to produce a single jig or fixture. 3D printing allows the design to be easily modified and printed on demand, allowing for greater flexibility and faster turnaround times.
3D-printed jigs and fixtures can also be made from a variety of materials. Depending on the component being manufactured, a particular material may be required to ensure a precise fit. With 3D printing, engineers can choose from a wide range of materials, including plastics, metals, and composites, to produce jigs and fixtures that are both strong and durable.
Engine Parts
3D printing can produce engine components, such as valves, pistons, and even cylinder heads, with the exact specifications needed to ensure maximum efficiency and performance.
The ability to 3D-print engine parts has also made it easier to:
- Create prototypical models of new engine designs
- Improve engine development
- Optimize engine volume and performance
- Create engines with aerodynamic properties, and
- Design engines with intricate designs.
By 3D-printing engine parts instead of making them using traditional subtractive processes, automobile companies can cut production costs and time by a great deal. They can also achieve the creation of engine parts with complex geometries, thereby creating customized designs that will lead to improved engine performance and efficiency.
How To 3D Print Car Parts in the Automotive Industry
1. Make Your Model or Prototype
The first step of 3D-printing a car is to design a digital model or prototype of the car part to be fabricated. The models are usually made using CAD or computer-aided design file, which is the design template or model for the object the manufacturer wishes to print. CAD software originates from the need to solve complicated manual design problems engineers face during technical hand drawing.
Users can customize CAD design files to meet exact specifications, produce complex geometries that are impossible to make manually, and quickly create variations for product development. After creating the CAD file, the next step will be to prepare it for 3D printing through 3D slicing. Slicing the model is the process of dividing it into thin layers, which will then be printed one at a time.
2. Choose Your Material
3D printing is a diverse technology that accommodates flexibility by allowing manufacturers to choose the preferred materials. The material a manufacturer chooses depends on various factors, including the type of car part, its use, and the preferred strength of the car part being created.
Materials chosen should not be treated as one-size-fits-all. It should match the material and the functionality of the part being produced. Some popular materials used in 3D printing car parts include:
- Plastic filaments such as polycystic acid (PLA) or acrylonitrile butadiene styrene (ABS)
- Powders such as polyamide (Nylon) and Alumide
- A resin such as high-detail resin, paintable resin, and transparent resin.
- Metal such as Bronze, Gold, and stainless steel
- Graphene
- Carbon fiber
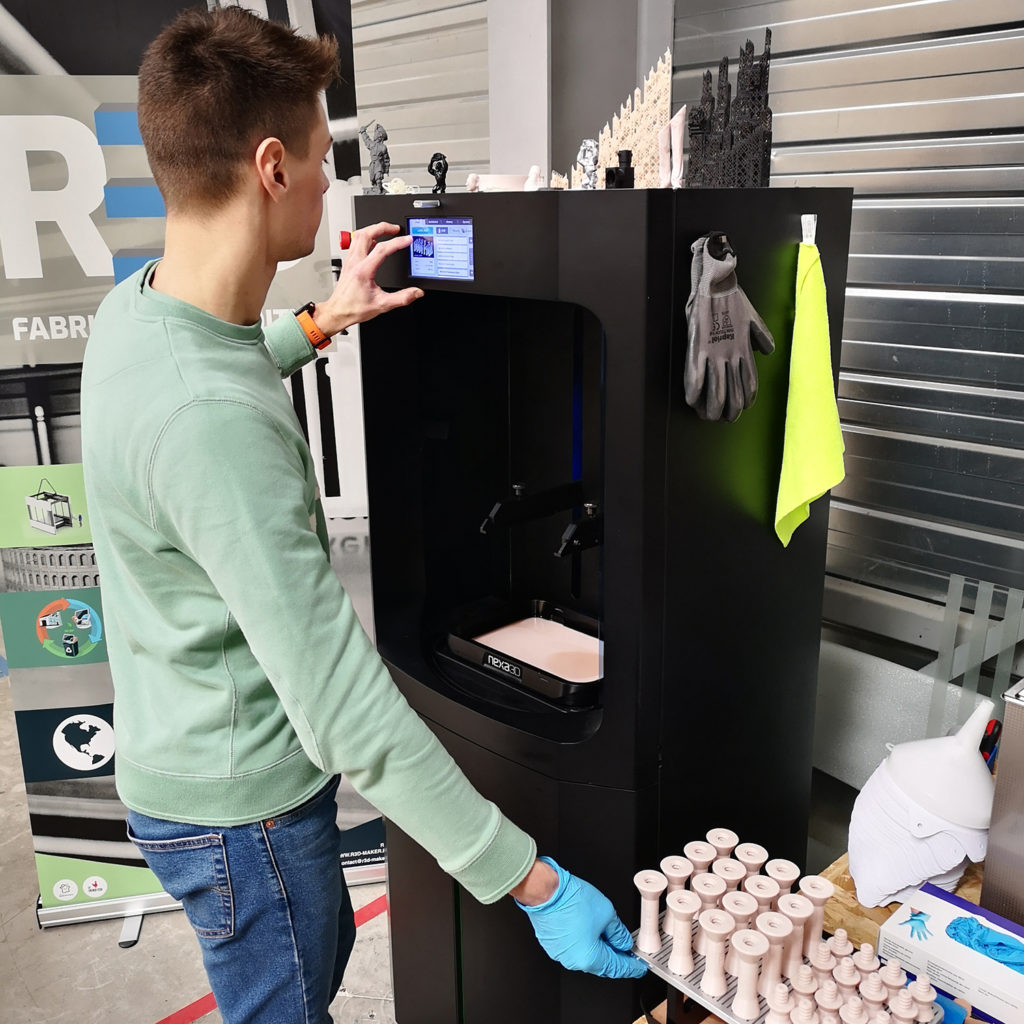
3. Part Production
After figuring out the car parts’ preferred scale, model, and material, you can begin printing the CAD model. This of course requires having the right 3D printer for the job: do you want to use a professional SLA 3D printer to create precise, high-resolution, high-quality products with less post processing time? Or are you looking for a high-speed SLS 3D printer for durable, functional parts and prototypes?
SLA 3D printers are typically used during the prototyping phase of automotive components while SLS is often used for production components. This is mainly due to production volumes being much higher and requirements for SLS material properties when parts are being made for final use.
This means both SLS and SLA 3D printers are a great fit for the automotive industry.
Browse all Nexa3D printers today.
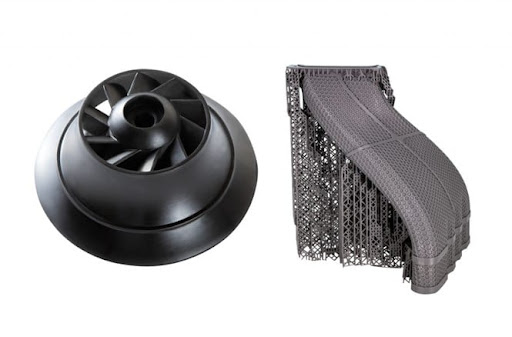
4. Post-processing
Post-processing involves adding the finishing touches and details to a 3D-printed object to improve its strength, functionality, and aesthetics. Some examples of cleaning and prepping techniques include:
- Support removal: Not every 3D model will have supports, but if yours will have, you must remove them before doing any other post-processing activities. Depending on the material used, supports can be soluble (made from HIPS and PVA) or insoluble (made from the same material as the 3D-printed object) in water and have different ease of removal. Although the support removal process does not require many tools, they may still leave marks on the car part.
- Sanding: Many 3D-printed objects have a rough or slightly rough surface that might impair their functionalities and aesthetics. As a result, sanding is used to make them smoother.
- Welding: Welding is another basic post-processing technique used to join small car parts together. It is only done when a larger part is printed into several parts due to technical needs or a small 3D printer build volume. The process is often done on parts made of acrylonitrile butadiene styrene (ABS) or metals. The process involves using acetone and requires a low skill level but a steady hand
- Gluing: Glue is perfect for connecting other 3D parts not made from ABS. Like welding, it is mostly used when you cannot print one complex part as a whole due to a small printer build volume.
After these techniques, the car part may be ready to be used or require further processing. Some other processing techniques you may put your 3D-printed car part include:
- Priming: Involves coating the car part with primer paint or spray as a base layer for the paint. This ensures any paint applied is even and not splotchy.
- Painting: Enhances the look and feel of the object, especially in cases where aesthetics are important.
- Smoothing: Use sandpaper, acetone, or isopropyl to smooth your part.
- Polishing: Achieves an extremely smooth, almost mirror-like surface. It can be done using a plastic polisher and a microfiber cloth or a polishing tool known as dremel buffer.
- Electro-coating: Involves adding a metal coating to a 3D-printed object with a metal surface. The process is done to improve the object’s strength and visual appearance.
The techniques used depend on the type of car part printed and its function. Some 3D-printed car parts may require nothing but basic cleaning and prepping techniques while others may require extensive post-production.
5. Installation
After processing the finished car part it is time to test and install it. The installation process determines the tools necessary for the job. When engineers find the end product unsatisfactory at this stage, they go back to the drawing board to figure out what is wrong and fix the mistake.
What Kinds of 3D Printers are Best for 3D Printing Car Parts?
There are different kinds of 3D printers in the market today. However, when it comes to making car parts in automotive companies, resin 3D printing is the go-to option.
Resin 3D printing is a vat photopolymerization form of additive manufacturing that uses liquid resins to create objects layer-by-layer. Due to the thin layers and precision of the light, resin 3D printers can produce models with higher detail, accuracy, and a smoother finish than other 3D printing technologies.
Several generations of resin 3D printing technology have been developed, including Stereolithography (SLA), Digital Light Processing (DLP), and Masked Stereolithography (mSLA).
Each emerging technology significantly improves over its predecessor and broadens the range of objects for 3D printing. Masked Stereolithography, the latest generation of SLA 3D printing, uses masks to control where light reaches the build plate. Masked light ensures that only specific areas are exposed to the light, allowing for highly detailed prints that can be printed faster than traditional SLA printers.
Resin 3D printing is best for models and products that require high accuracy, detail, and resolution. It is also ideal for producing end-use parts with a smooth finish.
Of the range of resin 3D printers in the market today, Nexa3D printers offer unmatched speed and accuracy, both of which are necessary factors in the automotive industry. Nexa3D resin printers deliver high production throughput while lowering the cost of production, thereby helping automotive companies produce more car parts with fewer costs, a feat that is unachievable using traditional SLA techniques.
Examples of 3D Printing in the Automotive Industry
3D printing has been utilized in various use cases in the automobile industry from being used to make spare parts to creating Formula 1 cars. Of these use cases, Nexa3D has become a major player in helping automotive companies realize their 3D printing goals. Some use cases where Nexa3D’s resin printers played significant roles in the automotive industry include:
1. End-use Aftermarket Car Parts
In 2021, R3D invested in Nexa3D’s NXE 400 3D printer for the toolless production of over 7,000 custom aftermarket components. The printer was used to make durable and lightweight aftermarket components for 400 police cars for the French Gendarmerie.
The turnaround time was three months for the 7,200 components needed for all 400 cars. With the NXE 400 3D printer, R3D was not only able to meet the timeline but also create durable, high-quality components that can withstand UV radiation and resist hot and cold weather conditions in the vehicles.
“We only had a single NXE 400, but we were able to achieve the initial run of 7200 components well within the 3 month timeline. That’s a feat that would not be possible with any other 3D printer that I’ve used.”
-Patrick Gaspard, Founder, R3D
2. Formula 1 Cars
Formula 1 racing team Williams Racing partnered with Nexa3D to create custom polymer parts for motorsport applications. By leveraging the ultrafast NXE 400 3D printer, Williams Racing aims to create lightweight parts to enhance the aerodynamic properties of the team’s race cars. With this, the team can easily and quickly create custom parts to make their race cars more efficient and remain highly competitive in the racing world.
Start Your Automotive 3D Printing Journey
3D printing has revolutionized the automotive industry by enabling the production of car parts quickly, affordably–and with more precise, complex geometries–than traditional manufacturing methods.
Nexa3D, a leader in industrial 3D printing solutions, is a key player in this automotive industry with cutting-edge 3D printing technology and solutions. With a lineup of 3D printers that includes a wide range of high-quality 3D printers, such as the XiP Pro, NXE 400Pro, XiP, QLS 230/6 and QLS 820, engineers and manufacturers can access the highest-performing 3D printing system for their automotive printing needs.